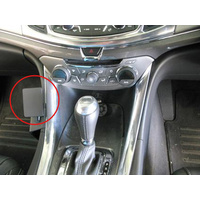
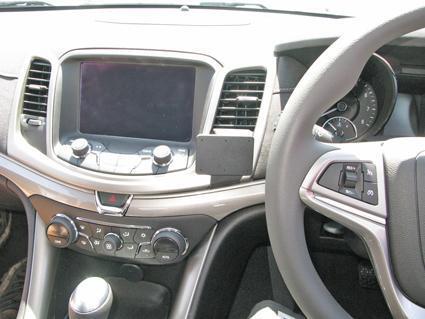
Console Mount - Left
With Pre-Drilled AMPS Pattern Holes
SKU:634946
Mount Fit Details
Holden Caprice Year(s):13-17
Holden Commodore VF (all models) Year(s):13-17
SKU:634946
$49.90

THE MOUNT
NO HOLES, NO DRILLING
EASY INSTALL
CUSTOM DESIGN IN SWEDEN
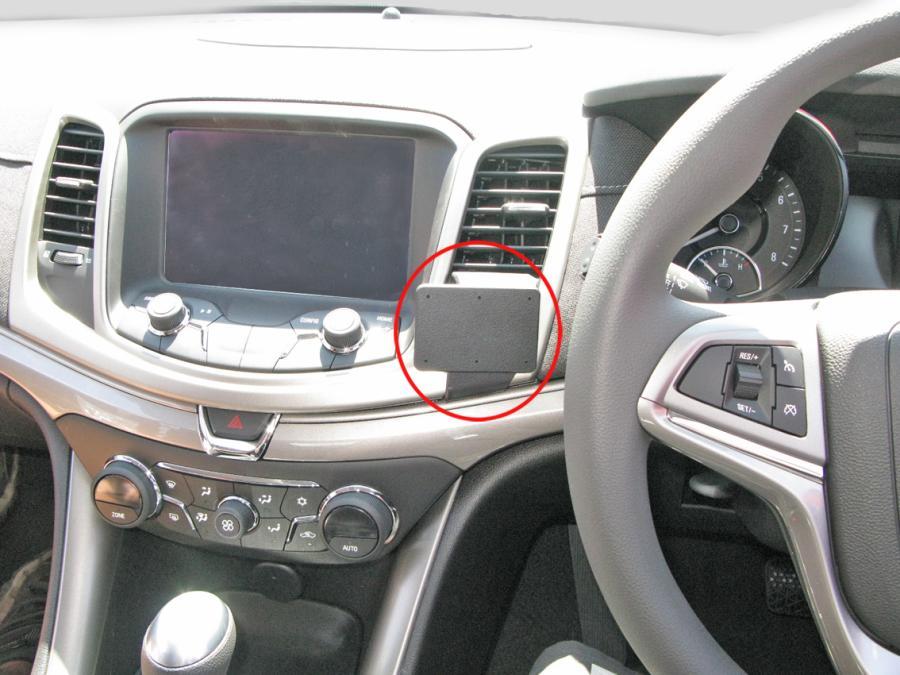
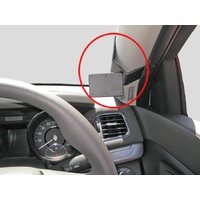
| This Mount Fits | Holden Commodore VF (all models) Year(s):13-17 |
| SKU | 655180 |
| Barcode # | 7320286551809 |
| Brand | ClicOn |
| Shipping Weight | 0.1000kg |
| Shipping Cubic | 0.002106000m3 |
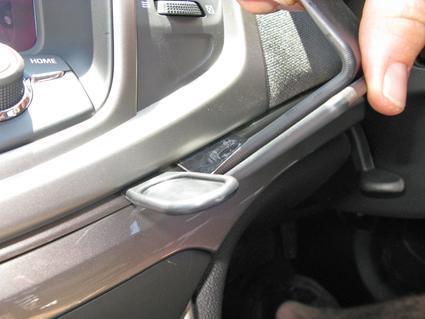
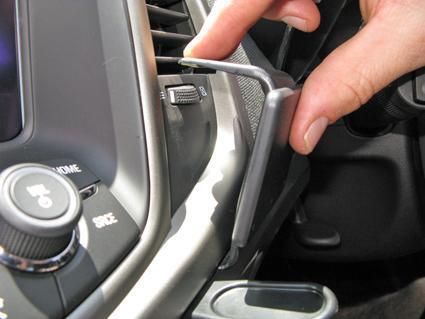
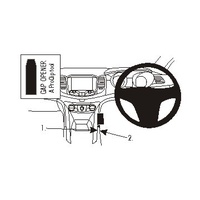
Below you will find the installation instructions for the Centre Mount (SKU:655180), you can click on the images to open a larger version in a new tab
Please read all of the instructions and look at the pictures before installing the ClicOn. Insert the thin end of the enclosed gap opener into the gap dividing the center control panel, to widen the gap. Use the enclosed alcohol pad to clean the area where the ClicOn is to be installed. Remove the adhesive tape cover on the ClicOn. Insert the angled lower edge of the ClicOn into the gap next to the gap opener. Move the ClicOn ProClip upward/forward so the angled lower edge goes into the gap and hooks behind the panel. Remove the gap opener. Insert the upper angled edge into the gap on the lower inside of the air vent. Make sure the cut outs fit into the gap. Press the upper edge of the ClicOn downward so the adhesive tape fastens properly. The ClicOn is in place.
Please read all of the instructions and look at the pictures before installing the ClicOn. Insert the thin end of the enclosed gap opener into the gap dividing the center control panel, to widen the gap. Use the enclosed alcohol pad to clean the area where the ClicOn is to be installed. Remove the adhesive tape cover on the ClicOn. Insert the angled lower edge of the ClicOn into the gap next to the gap opener. Move the ClicOn ProClip upward/forward so the angled lower edge goes into the gap and hooks behind the panel. Remove the gap opener. Insert the upper angled edge into the gap on the lower inside of the air vent. Make sure the cut outs fit into the gap. Press the upper edge of the ClicOn downward so the adhesive tape fastens properly. The ClicOn is in place.
Please read all of the instructions and look at the pictures before installing the ClicOn. Insert the thin end of the enclosed gap opener into the gap dividing the center control panel, to widen the gap. Use the enclosed alcohol pad to clean the area where the ClicOn is to be installed. Remove the adhesive tape cover on the ClicOn. Insert the angled lower edge of the ClicOn into the gap next to the gap opener. Move the ClicOn ProClip upward/forward so the angled lower edge goes into the gap and hooks behind the panel. Remove the gap opener. Insert the upper angled edge into the gap on the lower inside of the air vent. Make sure the cut outs fit into the gap. Press the upper edge of the ClicOn downward so the adhesive tape fastens properly. The ClicOn is in place.
Please read all of the instructions and look at the pictures before installing the ClicOn. Insert the thin end of the enclosed gap opener into the gap dividing the center control panel, to widen the gap. Use the enclosed alcohol pad to clean the area where the ClicOn is to be installed. Remove the adhesive tape cover on the ClicOn. Insert the angled lower edge of the ClicOn into the gap next to the gap opener. Move the ClicOn ProClip upward/forward so the angled lower edge goes into the gap and hooks behind the panel. Remove the gap opener. Insert the upper angled edge into the gap on the lower inside of the air vent. Make sure the cut outs fit into the gap. Press the upper edge of the ClicOn downward so the adhesive tape fastens properly. The ClicOn is in place.


Holden Caprice Year(s):13-17
Holden Commodore VF (all models) Year(s):13-17
$49.90
Holden Caprice Year(s):13-17
Holden Commodore VF (all models) Year(s):13-17
$49.90
Holden Caprice Year(s):13-17
Holden Commodore VF (all models) Year(s):13-17
$49.90